Showing posts with label recipes. Show all posts

Better than Panera Chocolate Chip Cookies Recipe


There's one thing my family is obsessed with. And that's cookies. Our favorite cookie? Chocolate chip cookies!

There are many nights that my husband comes home and, after eating dinner together, heads to the  kitchen to start a batch of homemade chocolate chip cookies. You can understand now why it's so hard to stick with a diet plan in this house.

One cookie we absolutely love are the Panera chocolate chip cookies. Every bite is filled with chocolate and they're super soft with the perfect crunchy outer layer. So when we heard of a chocolate chip cookie recipe that was deemed better than Panera we had to try it out.

The results? Oh, these cookies are definitely better. And worth making again and again!

Better Than Panera Chocolate Chip Cookies

  • 2 cups all-purpose flour
  • 1/2 teaspoon baking soda
  • 1/2 teaspoon salt
  • 3/4 cup unsalted butter, melted
  • 1 cup packed brown sugar
  • 1/2 cup white sugar
  • 1 tablespoon vanilla extract
  • 1 egg
  • 1 egg yolk
  • 2 cups mini semi sweet chocolate chips

Preheat the oven to 325 degrees. Line cookie sheet(s) with parchment paper.

Sift together flour, baking soda, and salt. Set aside.

In a stand mixer, cream together the melted butter, brown sugar and white sugar until light and fluffy. Beat in the vanilla, egg, and egg yolk until mixture is creamy.

Mix in the sifted dry ingredients until just combined. Using a spatula, fold in the mini chocolate chips.

Using a cookie scoop, drop cookie dough (about 1/4 cup) onto the prepared chookie sheets. Cookies should be about 3 inches apart.

Bake for 15-17 minutes or until edges are golden brown. Cool on cookie sheet for 1-2 minutes before transferring to a wire cooling rack. Cool completely before serving.

Makes about 18 large cookies.

What's your favorite cookie? 

Delicious Pumpkin Bars with Cool Whip Frosting #CoolWhipFrosting {Pumpkin Recipe}


Oh Fall! I'm so happy you're here again. We could definitely use the cooler weather (if that ever happened) and I'm very excited about the upcoming holidays. But a more important reason why I'm here... is because with Fall comes pumpkins! And canned pumpkin is on the shelves in full force.

That means I get to try a whole new batch of recipes out on my friends, family, and playgroup and this year is no different. I decided to go with a pumpkin bar. But the special ingredient isn't the pumpkin, it's the Cool Whip Frosting on top. If you want the perfect pumpkin treat this season you need to try this recipe.

Pumpkin Bars with Cool Whip Frosting
  • 3 eggs
  • 1 2/3 cups sugar
  • 1 cup vegetable oil
  • 15 oz pumpkin puree 
  • 2 cups flour
  • 2 teaspoons baking powder
  • 2 teaspoons cinnamon
  • 1 teaspoon baking soda
  • 1 teaspoon pumpkin pie seasoning
  • 1 teaspoon salt


1. Preheat oven to 350 degrees. Grease an 8x8 pan with butter or cooking spray.
 

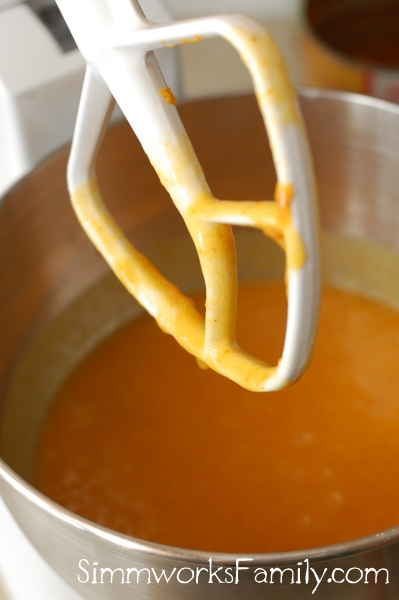
2. In a stand mixer with a paddle attachment, beat together sugar, pumpkin, oil, and eggs on medium until light and fluffy.


3. In a large bowl, sift together flour, baking soda, baking powder, cinnamon, pumpkin pie spice, and salt.


4. With a spatula, add flour mixture to liquid mixture until just combined. Make sure not to over-mix.


5. Pour batter into prepared pan and bake at 350 for 35-40 minutes.

  
6. Once the pumpkin bars are cooked, transfer to a cooling rack.
 

7. When completely cooled, cut off top to make an even, flat surface.


8. Cut into squares.


9. Grab the Cool Whip Frosting and start spreading it on.


10. Top each bar with a pecan and serve.


This recipe makes 16 servings.

Note: 
You can easily bake in a 9x13 pan instead for thinner bars to feed a larger crowd. Simply reduce cooking time to 20-25 minutes. Feel free to frost then cut if you feel that frosting each individual bar will take too long. I just hate dealing with crumbs in my frosting.


What do you love to make with pumpkin? 


Disclaimer: I am a member of the Collective Bias™ Social Fabric® Community. This content has been compensated as part of a social shopper insights study for Collective Bias™ and Kraft Cool Whip. All opinions are my own. #CoolWhipFrosting #CBias #SocialFabric

Smarties Sugar Cookies {Halloween Recipe} #IAmASmartie


I love when I can take something that I love and create something equally as great. Smarties are one of my favorite Halloween sweet treats and I love passing them out to trick-or-treaters. Not only are they gluten-free, they're free of most allergens and are low in fat as well. But in this recipe they are most definitely not gluten free. Nor are they low in fat...

By pulsing the Smarties in a food processor I created a flour and used the Smarties in a family sugar cookie recipe. I simply reduced the amount of sugar called for in the recipe and subbed the Smarties flour. The end result was fantastic! A not-too-sweet sugar cookie that was definitely flavored by the Smarties. Yum!

And perfect for any Halloween party coming up. We baked them up for our parish festival's bake sale and they were quite a hit. Three to a bag with a few Smarties thrown in. Who could resist? Here's how to make them:

Smarties Sugar Cookies
  • 1 cup sugar
  • 1 cup butter, softened
  • 1/2 cup Smarties, about 20 rolls
  • 1 egg
  • 1 tablespoon vanilla
  • 1 tablespoon light corn syrup
  • 3 1/2 cups flour, sifted
  • 1/2 teaspoon salt


1. Unwrap the Smarties and place them in the food processor (I first tried to crush them with a rolling pin with no luck).


2. Pulse the Smarties in the food processor until ground to a fine dust. 


3. Measure out 1/2 cup of Smarties flour.


4. Cream the softened butter, sugar, and Smarties flour in a stand mixer.


5. Add in the egg, vanilla, and corn syrup. Mix well until combined.


6. Sift together the flour and salt.


7. Add the flour mixture into the bowl one cup at a time until combined.


8. Turn the dough out onto some plastic wrap and wrap tightly. Refrigerate for 1-2 hours.


9. When the dough is done in the fridge, preheat the oven to 375 degrees. Cut the dough into strips and then into squares. Roll each square into a ball. I created 1" balls so that the cookies would be small. Feel free to increase or decrease the size of the cookie dough balls.


10. Place the cookie dough onto a greased cookie sheet and smash down into a flat circle with a glass cup.


11. Sprinkle with some nonpareils (optional) and bake in the oven for 8-10 minutes.


12. Let the cookies cool completely on a rack before indulging, about 5-10 minutes.


13. Plate (or bag up) and enjoy!


This recipe makes about 70 1" diameter cookies. It can easily be doubled. You can also cut out shapes with cookie cutters by rolling the dough into a flat sheet after taking the dough out of the fridge.

Want to see what else I've done with Smarties? Check out this awesome DIY Smarties Wreath on my blog post here. 

What's your favorite sweet treat this Halloween season?

Disclaimer: I am a member of the Collective Bias™ Social Fabric® Community. This shop has been compensated as part of a social shopper insights study for Collective Bias™ and Smarties. All opinions are my own. #CBias #SocialFabric

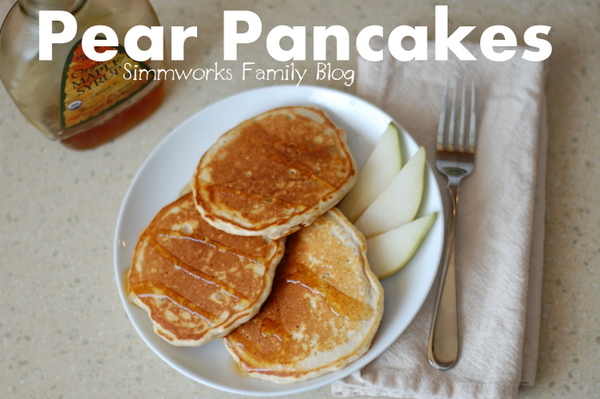
Pear Pancakes with Cinnamon {Breakfast Recipe}


Every morning we wake up and decide what to have for breakfast. Sometimes it's eggs, sometimes it's yogurts and berries, and sometimes it's cereal. But every once in a while we get a special treat.

Pancakes! 

Now, it's not that pancakes are hard to make. Or that they're labor intensive. We just don't eat them all the time. So when we do, we make them special. And I have to admit, when I run out of my Alton Brown pancake mix, I grab a box mix.

But I don't leave it at that! We spice up our pancakes with the fruit and spices we have on hand and make them extra special and nutritious. When my kids were small I would add different purees into their pancake mix but now that they're older we like to dice up our fruit before adding it in.

And here's how we do it:

Pear Pancakes with Cinnamon
  • 1 cup Trader Joe's multigrain pancake mix
  • 1/2 cup milk 
  • 1 egg
  • 1/4 pear
  • 1 tsp cinnamon


1. Dice up the pear into small pieces.


2. Mix together the pancake mix, milk, and egg with a whisk until just incorporated. Do not over-mix.


3. Add in the diced pear and cinnamon. Fold in gently.


4. Let pancake batter sit while you prep the pan. Heat pan on medium heat.


5. Coat pan with butter. Take a towel and wipe off the excess batter (thanks, Alton, for that tip!)


6. Using a measuring cup, pour 1/4 to 1/3 of the batter onto the hot pan.


7. Let cook until batter is bubbling and edges look firm and underside is golden brown, about 1 1/2 to 2 minutes. Flip.


8. Let the other side cook until golden brown, about 2-3 minutes.


9. Repeat with the rest of the batter. If making large batches, store cooked pancakes in a warm oven (I set mine on the lowest setting and place pancakes on a plate with a towel on top to keep warm while I finish the rest of the batches).


10. Enjoy!

Makes 6 pancakes

Pancakes are so easy and versatile! Why stick with the same old plain pancakes when you can jazz them up? Switch up apples for pears and add some peanut butter on top and you have a tasty, and healthy meal perfect for this Fall!

Chicken Parmesan Bites {Toddler Approved Meals}

I have been trying to come up with healthy, fun dinners that my preschooler and toddler would be more interested in. Lately all they want is carbs and sweets so I've been thinking up ways to turn typical chicken dishes into more kid-friendly meals.

And I've been craving chicken parmesan for a while so why not make it into parmesan bites? Put a side of noodles and sauce on the plate and I had one meal my son and daughter were more than likely to enjoy. Right? Right! 

I put a plate of three chicken parmesan bites, 1/4 cup of noodles w/ sauce and a few broccoli florettes in front of them and they went to town! And the best part? I used only one chicken breast to feed my whole family. Isn't that awesome? And budget friendly!

 
Chicken Parmesan Bites 
  • 1 chicken, breast, cut into 1" pieces
  • 2 tablespoons 1% milk
  • 1/4 cup all-purpose flour
  • 1 egg white
  • 1/2 cup Progresso® Italian-Style Bread crumbs
  • 1/4 cup freshly grated Parmesan cheese 
  • 1 tablespoon olive oil
  • 1 teaspoon table salt
  • 1 teaspoon black pepper
Place chicken breast pieces in a bowl and cover with milk. Let soak for a few minutes while prepping the other ingredients. Place 1/4 cup of flour into a large ziploc bag. Measure out 1/4 cup of breadcrumbs and place into a container with salt and pepper. Grate parmesan cheese into the same container, stir to combine and set aside. Place egg white in a small bowl.

Take chicken and place in bag with flour. Shake vigorously until the chicken is well coated. Put coated chicken in bowl with egg white and stir to coat chicken. Place bread crumb mixture in bag you just used for flour. Put chicken back in the bag and shake again coating the chicken with bread crumbs.

Heat oil in a skillet on medium high heat. Add coated chicken to the pan and cook until golden brown, about 15 minutes. When chicken is cooked thoroughly remove from pan and serve with spaghetti and marinara sauce. Add some steamed veggies or a nice salad to make this a complete meal.

3 servings* (5 bites) | 7 WW+ Points

* Does not include spaghetti & marinara sauce

Pumpkin Cupcakes with Maple Cream Cheese Frosting {Dessert Recipe}

As I mentioned before, I'm a bit obsessed with pumpkin. And as soon as I got a whiff of coolness in the air I got to baking. I've been craving these cupcakes since the first time I made them a few years ago and with a few minor tweaks I think I've perfected my recipe.

These were delicious! And even better when left in the fridge overnight and eaten for breakfast the next morning with a hot cup of coffee ;) But if you can't wait that long to savor the goodness just make sure to allow the cupcakes enough time to cool before frosting them. You won't be disappointed!


Pumpkin Cupcakes With Maple–Cream Cheese Frosting

Cupcakes
  • 1 stick unsalted butter, room temperature
  • 1 cup firmly packed dark-brown sugar
  • 1/3 cup granulated sugar
  • 2 cups cake flour
  • 2 teaspoons baking powder
  • 1 teaspoon baking soda
  • 1 teaspoon ground cinnamon
  • 1 teaspoon ground ginger
  • 1/2 teaspoon ground nutmeg
  • 1/8 teaspoon ground cloves
  • 1/2 teaspoon salt
  • 1/4 teaspoon freshly ground black pepper
  • 3 large eggs
  • 1/2 cup buttermilk
  • 1 teaspoon vanilla
  • 1 cup canned pumpkin

Frosting
  • Two (8-ounce) packages cream cheese, softened
  • 1 stick unsalted butter, room temperature
  • 2 cups confectioners’ sugar
  • 1/4 cup pure maple syrup
  • 1 cup heavy whipping cream

 Preheat the oven to 350° (175°C). Line a cupcake pan with 18 liners.

Cupcakes:
Pour the milk into a measuring cup and add vanilla.

In a stand mixer, beat the butter and sugars on medium speed until fluffy, about 5 minutes. Meanwhile, sift the flour, baking powder, baking soda, cinnamon, ginger, nutmeg, cloves, salt, and pepper into a medium bowl.

Add the eggs one at a time to the mixer, scraping down the sides after each addition. Alternate adding the flour and milk mixtures, beginning and ending with the flour. Beat in the pumpkin until smooth. Scoop the batter into the cupcake liners, about 3/4 of the way up. Bake the cupcakes until a toothpick inserted into the center comes out clean, about 20 to 25 minutes. Cool the cupcakes on racks completely.

Frosting:
In a stand mixer beat all the ingredients on medium until fluffy but firm. Frost the cupcakes using either a spatula or a pastry bag w/ a large tip. Refrigerate the cupcakes for 30 minutes to set up frosting.