Showing posts with label Fall. Show all posts

How to Make a Spider Web Pumpkin


Each year we take the time to cut, gut, and carve out a few pumpkins. And every year we complain about the mess, the time, and the clean up. So this year we went simple! We let the kids paint pumpkins and we took an alternative approach.

We also used paints but used different kinds to make these spider web pumpkins. With the help of some spray paint and puffy paints we were able to make these super cool spider web pumpkins for our Amazing Spider-Man party and for our Halloween display.

It was super easy to do and I'm sure you'll find it just as simple to create a pumpkin masterpiece of your own! Here's what you do:

Spider Web Pumpkins

What you'll Need: 
  • Pumpkin
  • Spray Paint
  • Puffy Paint


What you do: 

1. Paint your pumpkin with your base color. We chose to go with black.


2. Using the puffy paint, make lines going down and across the pumpkin to create your web.


3. Add a spider to the web with puffy paint and let dry completely. 


Once the pumpkin is completely dry set it outside your door for everyone to enjoy!

How do you decorate pumpkins for Halloween? 

Delicious Pumpkin Bars with Cool Whip Frosting #CoolWhipFrosting {Pumpkin Recipe}


Oh Fall! I'm so happy you're here again. We could definitely use the cooler weather (if that ever happened) and I'm very excited about the upcoming holidays. But a more important reason why I'm here... is because with Fall comes pumpkins! And canned pumpkin is on the shelves in full force.

That means I get to try a whole new batch of recipes out on my friends, family, and playgroup and this year is no different. I decided to go with a pumpkin bar. But the special ingredient isn't the pumpkin, it's the Cool Whip Frosting on top. If you want the perfect pumpkin treat this season you need to try this recipe.

Pumpkin Bars with Cool Whip Frosting
  • 3 eggs
  • 1 2/3 cups sugar
  • 1 cup vegetable oil
  • 15 oz pumpkin puree 
  • 2 cups flour
  • 2 teaspoons baking powder
  • 2 teaspoons cinnamon
  • 1 teaspoon baking soda
  • 1 teaspoon pumpkin pie seasoning
  • 1 teaspoon salt


1. Preheat oven to 350 degrees. Grease an 8x8 pan with butter or cooking spray.
 

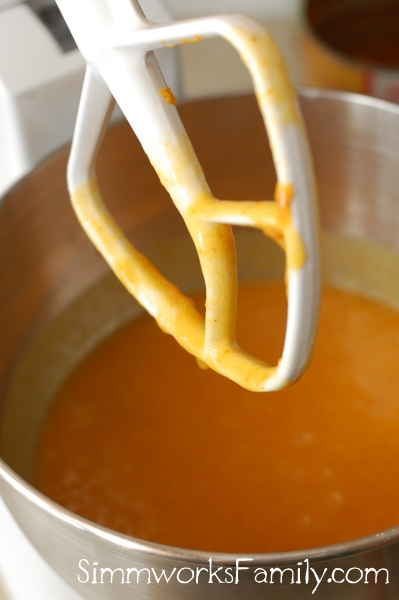
2. In a stand mixer with a paddle attachment, beat together sugar, pumpkin, oil, and eggs on medium until light and fluffy.


3. In a large bowl, sift together flour, baking soda, baking powder, cinnamon, pumpkin pie spice, and salt.


4. With a spatula, add flour mixture to liquid mixture until just combined. Make sure not to over-mix.


5. Pour batter into prepared pan and bake at 350 for 35-40 minutes.

  
6. Once the pumpkin bars are cooked, transfer to a cooling rack.
 

7. When completely cooled, cut off top to make an even, flat surface.


8. Cut into squares.


9. Grab the Cool Whip Frosting and start spreading it on.


10. Top each bar with a pecan and serve.


This recipe makes 16 servings.

Note: 
You can easily bake in a 9x13 pan instead for thinner bars to feed a larger crowd. Simply reduce cooking time to 20-25 minutes. Feel free to frost then cut if you feel that frosting each individual bar will take too long. I just hate dealing with crumbs in my frosting.


What do you love to make with pumpkin? 


Disclaimer: I am a member of the Collective Bias™ Social Fabric® Community. This content has been compensated as part of a social shopper insights study for Collective Bias™ and Kraft Cool Whip. All opinions are my own. #CoolWhipFrosting #CBias #SocialFabric

Wordless Wednesday: Painting Pumpkins


Smarties Are The Perfect Halloween Sweet Treat #IAmASmartie

One of my favorite parts of my childhood Halloween experience was racing home from trick or treating to sort out all of the Halloween candy I received. I was obsessed with finding my favorites (Smarties were at the top of the list along with chocolate). And one of my favorite parts of Halloween now are the decorations we put up each year. I absolutely love how festive and creative we get each year.

My husband is quite the Halloween decor enthusiast. Each year he purchases foam pumpkins from the store and creates a new face. And in an effort to keep up with him, I try to get creative as well in the decor inside our home.

Smarties Halloween candies #IAmASmartie

Gluten-Free and Allergen Free
This year I headed to Target to pick up some decorating supplies and candy to pass out. Since there are so many allergies and special diets these days, we went simple. Smarties all around! And I planned on decorating with Smarties as well.

Smarties are not only gluten-free, but they also contain no peanuts and are fat free! They're the worry-free, one-size-fits-all candy this holiday and are the perfect choice for passing out. I was able to pick up a large bag of Smarties and another bag of Smarties and Dum-Dums mixed together. My daugther was absolutely elated to put these bags into the cart to take home.

How to DIY a Smarties Wreath this Halloween #IAmASmartie

When we get ready for Halloween, decorations in our home are up there with Christmas. We decorate the whole house inside and out to celebrate for the whole month of October. Many of the decorations we use can be carried into November as well with a festive Fall theme but a few we make just for Halloween!

This Smarties Wreath is just that. The perfect celebration of Halloween and the excitement that each child feels as they go from door to door saying, "Trick or Treat!" This wreath is not only festive, it's easy to make as well! You only need a few simple items to put it together and it takes less than 30 minutes to make!

As an added bonus, it only cost me $5 to make. The $1 Spot at Target has these foam wreaths and the Smarties candies are only $7.99 for a huge bag and I only needed 1/2 the bag to make the wreath. I had the ribbon on hand from the end of season sale last year. And the left over Smarties will be passed out to trick or treaters on Halloween!   

Here's how to make a Smarties Wreath

What you Need:
  • 1 bag Smarties candies, in their wrapper
  • 1 wreath (I found mine in the $1 Spot at Target)
  • a glue gun with glue sticks
  • wire ribbon

What you do:

1. Lay out your wreath and candies as your glue gun warms up (I recommend not having the younger kids help with this part of the craft due to the hot glue gun).
 

2. Start with a single row of Smarties first by making a line of hot glue on the wreath.


3. Stick the Smarties candy seam side down so that the candies are sealed shut.


4. Continue to add Smarties candies all around the wreath. Make sure to leave room in between the candies on top so that the candies form a uniform circle around the wreath template. Make sure to leave a 1" gap for the ribbon at the top of the wreath.


5. Once the first layer is done, it's time to start the second layer to fill the gaps.


 6. Add a dab of glue to the center of the gap. Then add a dab of glue to the other end of the Smarties candy on the seam side. Firmly press down so that the glue adheres to each side of the Smarties candies next to it.


7. Once the Smarties candies are adhered to the wreath, measure out some wire ribbon in a coordinating Fall color.


8. Cut the ribbon to length.


9. Take both ends of the ribbon together in your hand and fold in half lengthwise.


10. Using the scissors, cut the ribbon ends at an angle to create a v-cut.


11. Once the ends are cut it's time to tie the ribbon onto the wreath!


12. Wrap one end of the ribbon around the gap at the top of the wreath once.


13. Making sure that the ends are even in length, tie a simple knot to secure the ribbon to the wreath.


14. Hang on your door and enjoy all season long!


And remember, Smarties isn't just the perfect candy to make a cute wreath, they're also the perfect candy to hand out this Halloween! They're low fat and gluten free! Not to mention that kids love them.

Stay tuned for more Smarties fun soon!

Disclaimer: I am a member of the Collective Bias™ Social Fabric® Community. This shop has been compensated as part of a social shopper insights study for Collective Bias™ and Smarties. All opinions are my own. #CBias #SocialFabric

Pumpkin Cupcakes with Maple Cream Cheese Frosting {Dessert Recipe}

As I mentioned before, I'm a bit obsessed with pumpkin. And as soon as I got a whiff of coolness in the air I got to baking. I've been craving these cupcakes since the first time I made them a few years ago and with a few minor tweaks I think I've perfected my recipe.

These were delicious! And even better when left in the fridge overnight and eaten for breakfast the next morning with a hot cup of coffee ;) But if you can't wait that long to savor the goodness just make sure to allow the cupcakes enough time to cool before frosting them. You won't be disappointed!


Pumpkin Cupcakes With Maple–Cream Cheese Frosting

Cupcakes
  • 1 stick unsalted butter, room temperature
  • 1 cup firmly packed dark-brown sugar
  • 1/3 cup granulated sugar
  • 2 cups cake flour
  • 2 teaspoons baking powder
  • 1 teaspoon baking soda
  • 1 teaspoon ground cinnamon
  • 1 teaspoon ground ginger
  • 1/2 teaspoon ground nutmeg
  • 1/8 teaspoon ground cloves
  • 1/2 teaspoon salt
  • 1/4 teaspoon freshly ground black pepper
  • 3 large eggs
  • 1/2 cup buttermilk
  • 1 teaspoon vanilla
  • 1 cup canned pumpkin

Frosting
  • Two (8-ounce) packages cream cheese, softened
  • 1 stick unsalted butter, room temperature
  • 2 cups confectioners’ sugar
  • 1/4 cup pure maple syrup
  • 1 cup heavy whipping cream

 Preheat the oven to 350° (175°C). Line a cupcake pan with 18 liners.

Cupcakes:
Pour the milk into a measuring cup and add vanilla.

In a stand mixer, beat the butter and sugars on medium speed until fluffy, about 5 minutes. Meanwhile, sift the flour, baking powder, baking soda, cinnamon, ginger, nutmeg, cloves, salt, and pepper into a medium bowl.

Add the eggs one at a time to the mixer, scraping down the sides after each addition. Alternate adding the flour and milk mixtures, beginning and ending with the flour. Beat in the pumpkin until smooth. Scoop the batter into the cupcake liners, about 3/4 of the way up. Bake the cupcakes until a toothpick inserted into the center comes out clean, about 20 to 25 minutes. Cool the cupcakes on racks completely.

Frosting:
In a stand mixer beat all the ingredients on medium until fluffy but firm. Frost the cupcakes using either a spatula or a pastry bag w/ a large tip. Refrigerate the cupcakes for 30 minutes to set up frosting.

Pumpkin Cheesecake Bars {Dessert Recipe}

When Fall comes there is one thing I am most excited about. The return of canned pumpkin on the shelves! I start out small. Buying maybe 4 cans of pumpkin on my first spotting. Then I get a bit crazy. I need to stock up for the rest of the year. How can I not have 10 or so cans of pumpkin in my pantry by mid-October? And what do I use these cans and cans of pumpkin for? Healthier recipes!

Pumpkin is a great ingredient in baking, cooking and no-bake recipes such as this one. It's simple and easy to use and best of all... it's super tasty and healthy! Now I've already been making my pumpkin waffles, pumpkin muffins and even a pumpkin oatmeal shake. But I hadn't yet tried anything with pumpkin and cheesecake before. So this past weekend I decided to try out a no-bake recipe for pumpkin cheesecake bars. And they were delicious.

If you have a can of pumpkin lying around you have to try it!


Pumpkin Cheesecake Bars

  • 1 package (8 oz.) neufchatel cheese, softened*
  • 1 cup canned pumpkin
  • 1/3 cup agave nectar (or 1/2 cup sugar)
  • 1/2 tsp. pumpkin pie spice
  • 1 tub (8 oz.) Cool Whip Free whipped topping, thawed, divided
  • 1 package graham crackers (about 24), crushed
  • 4 tablespoons light butter, melted
Line an 8x8 or 9x9 baking dish with plastic wrap. Mix graham cracker crumbs and melted butter until the crumbs resemble moist sand. Push crumb mixture into dish with your fingers evenly to create a level crust on the bottom. Make sure to get the crumbs into the corners of the dish as well.

Beat cream cheese, pumpkin, agave and pumpkin pie spice with electric mixer on low speed for one minute. Increase speed to medium and mix for another 3 minutes or until no lumps are visible. Gently stir in 2-1/2 cups of the whipped topping. Cover and refrigerate remaining whipped topping for later use.

Spoon cream cheese mixture into crust and refrigerate 3 hours or overnight. Serve topped with remaining whipped topping. Store leftover cheesecake in refrigerator.

*How to Soften Cream Cheese
Place completely unwrapped package of cream cheese in microwavable bowl. Microwave on HIGH 10 to 15 seconds or until slightly softened. If you cannot find neufchatel cheese in your grocery store just go for the reduced fat cream cheese. Same thing, different name.

Serves 16 | 5 WW+ Points

Bates Nut Farm 2011

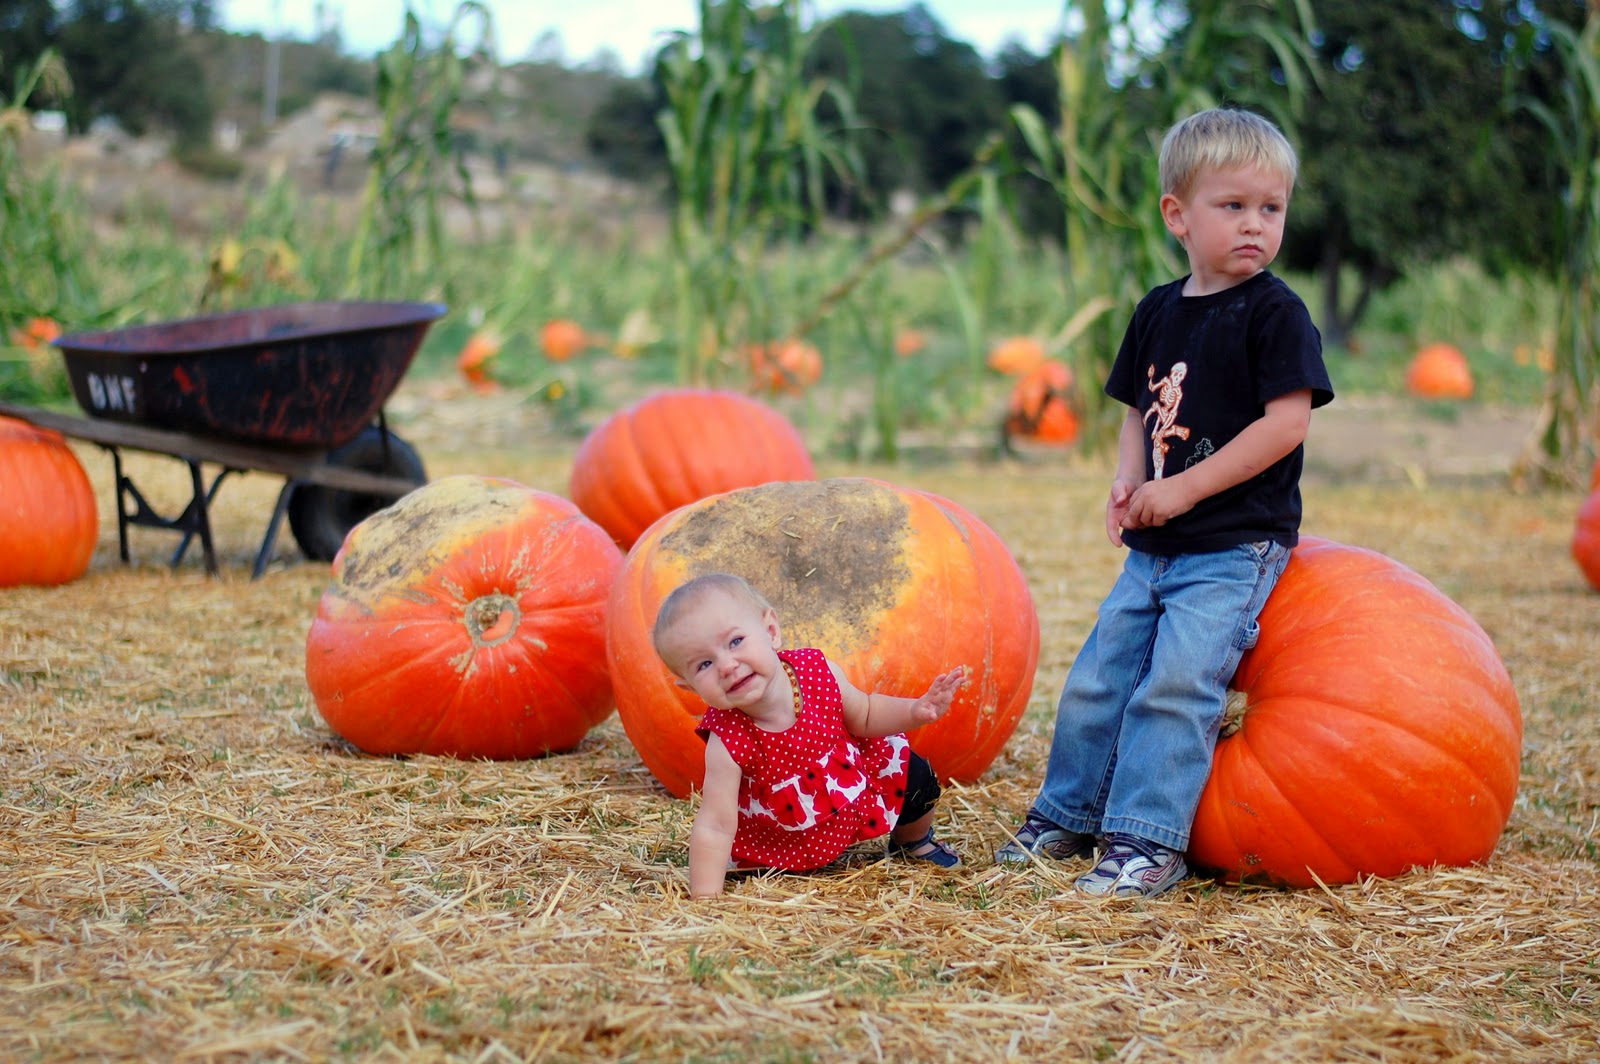
I don't know if I've mentioned this before but I love traditions. And when I had kids I knew I wanted to create some traditions with my little family that we could continue to do every year. One of those traditions was going to a pumpkin patch every year. And not just any pumpkin patch, Bates Nut Farm. Ok... so no, it's not called Bates Pumpkin Patch but this farm is a great location for family fun during the Fall season. 


We checked out the awesomely huge pumpkins and picked out some nice medium sized ones to take home. Then we headed over to ride the tractor train. This is one of our son's favorite things to do at the farm. We bought a (very affordable - $7.75) pumpkin package that included: 

  • 1 pumpkin
  • 1 tractor ride
  • 1 straw maze
So after we went on the tractor ride we headed over to the maze. Now this isn't a huge, can't see over the top of the corn and hay type of maze (and there's no way we could get lost and have to call 911 to get us out of there) but it's still fun and perfect for the little ones. E made his way to each stamp station and placed a stamp in the coordinating box on his stamp card. At the end of the maze you're supposed to turn in your card to get a prize but E lost interest and wanted to check out what else the farm had to offer... animals!


Now we asked E when we first got there what he wanted to do. And he responded by saying he wanted to ride the ponies and pet the animals. So we headed over to the ponies. And to our surprise E didn't want to go on them. He wanted to go play with the goats and chickens. So we paid our entrance to the petting zoo and headed in.

We were greeted with goats and sheep of different sizes, some chickens roaming around and some adorably cute little bunnies (and a larger bunny). Both kids pet just about every single animal in the corral. And they had a great time doing it. Miss M walked around while holding Daddy or Mommy's hand and kept pointing to each animal she wanted to go to. Once E saw the little bunnies there was no getting him away from them. He wanted to feed them, hold them and cuddle them until we had to drag him out.


After we pet every animal on the farm we headed up to the general store to see what goodies we could score this year. Last year I indulged in some delicious pumpkin fudge so I wanted to try something different. Right away the kids spotted the barrels of candy so we let them get a small amount to take home. And I ended up choosing a bag of walnuts as my treat. I'm still thinking of what I want to make (or bake) with them. I'm sure I'll post a recipe of what I decide over on the cooking blog.

All in all it was a great family day. And I hope the tradition stays alive and we continue to enjoy Bates Nut Farm for years to come!