Showing posts with label Pumpkin. Show all posts

5 Alternatives for Carving Pumpkins {Fun Kids Crafts}


Having small children can sometimes make pumpkin carving a bit difficult. So this year we went with something a little different and let the kids make a few varieties of pumpkins. Grab some glue, your potato head pieces, and even the paint and see what your kids do to create their Fall masterpieces!

If you're in the same boat and are looking for great alternatives to carving your pumpkins this year, here are a few ideas:

1. Painting your Pumpkins

Instead of carving out a design, simply use a paper cut out to block out a design on your pumpkin and paint around it! Head on over to FormulaMom.com to see how we painted the castle pumpkin above.

Add Cinderella's carriage by simply cutting out a few felt pieces and gluing them onto a fairytale pumpkin to complete the storybook tale. 


2. Mrs Pumpkin Head
See how easy it is to create a Mrs. Pumpkin Head (Mr. Potato Head's lady friend) with this easy and fun idea from Fabulous Finds by Tiffany.


3. Spider Web Pumpkins
With a little bit of spray paint and some puffy paint, you can create just about any design on your pumpkin with a great look! I created this Spider Web Pumpkin for our Amazing Spider-Man party that I'll be hosting on Halloween this year. I can't wait to see what my guests think.


4. Foam Sticker Pumpkins
When we went up to Mammoth Mountain a few weeks ago we got to decorate pumpkins at  Oktoberfest. Instead of letting the kids carve pumpkins, they had these awesome foam sticker kits they got from the craft store. Our kids made this pirate pumpkin and loved applying the stickers to the pumpkin.


5. Crayon Dripped Pumpkin
Now this has got to be the coolest looking pumpkin ever! Taylor Made Mama did it right when she made this Crayon Dripped Pumpkin. It reminds me of the drippings of a candle.

It's definitely Halloweenesque and would go great for any decor. Plus I love that you could easily use all one color or be selective in the colors you use to go with a theme or style.

How are you decorating your pumpkin this year?

How to Make a Spider Web Pumpkin


Each year we take the time to cut, gut, and carve out a few pumpkins. And every year we complain about the mess, the time, and the clean up. So this year we went simple! We let the kids paint pumpkins and we took an alternative approach.

We also used paints but used different kinds to make these spider web pumpkins. With the help of some spray paint and puffy paints we were able to make these super cool spider web pumpkins for our Amazing Spider-Man party and for our Halloween display.

It was super easy to do and I'm sure you'll find it just as simple to create a pumpkin masterpiece of your own! Here's what you do:

Spider Web Pumpkins

What you'll Need: 
  • Pumpkin
  • Spray Paint
  • Puffy Paint


What you do: 

1. Paint your pumpkin with your base color. We chose to go with black.


2. Using the puffy paint, make lines going down and across the pumpkin to create your web.


3. Add a spider to the web with puffy paint and let dry completely. 


Once the pumpkin is completely dry set it outside your door for everyone to enjoy!

How do you decorate pumpkins for Halloween? 

Creating the Perfect Playdate Snack with Pumpkin and Cool Whip Frosting #CoolWhipFrosting


Every year I wait in anticipation for Fall to arrive. No, it's not for the cooler weather. I wouldn't kid myself with that in Southern California (it's in the high 80s this week). I love Fall for the pumpkin! And as soon as canned pumpkin hits the shelves I hoard it so that I have an awesome supply to last the rest of the year.

And every year I try to test out a new pumpkin recipe to add to the list of recipes I know and love. I tried out pumpkin waffles the year I was pregnant with my son (in '08),  pumpkin muffins with maple honey cream cheese frosting the next year ('09), pumpkin cupcakes in 2012 (totally different than the muffins!), and pumpkin cream cheese bars last year.


It's All About the Frosting
In deciding what to try out this year I wanted something simple. Basic and tasty. And it had to be a crowd pleaser (not that the other years recipes weren't crowd pleasers). So off to the internet I went. And after a few minutes perusing Pinterest, Kraft recipes and my favorite recipe blogs I decided I'd tackle a pumpkin bar recipe.

Pumpkin bars not only need to be amazingly moist and tasty, they also need to be topped with an equally tasty frosting. Normally I would go with my go-to cream cheese buttercream but I thought this recipe might be better with a lighter, fluffier frosting. This is where Cool Whip's new Cool Whip Frosting came into play.


Gathering Ingredients
I headed out to Walmart to pick up a few key ingredients that we were out of at home (including the canned pumpkin) and checked out their selection of Cool Whip Frosting. Sadly I didn't see the cream cheese flavor I was hoping to grab but selected the vanilla flavor instead.

Since I love Cool Whip on my pumpkin pie I was sure my guests would love the Vanilla Cool Whip Frosting on the pumpkin bars. Cool Whip Frosting comes in 3 flavors perfect for any recipe:
  • Vanilla
  • Chocolate
  • Cream Cheese
I also needed to grab some sugar and chocolate chips for some other baked goods I was also making. My kids are constantly requesting chocolate chip cookies so I decided to make some pumpkin chocolate chip cookies with the rest of the canned pumpkin I had left over. 

To read more about the fun I had at Wal-mart picking out my ingredients, check out my Cool Whip Frosting Google + Album. 


Delicious Playdate Snack
Every month I host a playgroup playdate at my home. I'm the organizer of a local meetup group and as organizer feel that having playdates at my home make new members feel more at ease about meeting everyone.

Along with the playdate fun, I always make a snack or breakfast treat for the kids and moms to enjoy as we chat, play, and have fun. For this everyday occasion I decided to make the pumpkin bars I was already eying. What kid doesn't love pumpkin and Cool Whip?

You can check out my Pumpkin Bars with Cool Whip Frosting recipe here.


Easy to Spread and Very Tasty
Once I made the pumpkin bars and let them cool completely (the hardest part about baking... the waiting) I trimmed off the uneven top and cut them into squares. Then I put them on my cake stand and frosted them with the Vanilla Cool Whip Frosting. Not only did it spread easily, it was also thick enough to cover each bar generously.

I loved the texture of the frosting and the flavor was absolutely amazing. Instead of the thinner density of Cool Whip, the Cool Whip Frosting was thicker. But still light, airy, and cool. And the taste of this frosting complimented the pumpkin perfectly. Silky smooth and not too sweet. 


Kid Tested Kid Approved
I topped each bar with a pecan and put them out for everyone to enjoy. Within 10 minutes, each guest had a pumpkin bar and were heading back to grab another. Now don't think I was starving my guests, they also had plenty of other snack options to choose from.

What I loved was how much the kids enjoyed this frosting. Of course my daughter ate only the frosting and asked for more but the other kids chowed down on the whole pumpkin bar. Most tossed the pecan aside and started right on top! Princess Elodie below dug in right away and even finished my daughter's later on. Now that's kid approved!


Indulgence for Mom
Once everyone had headed home and the kids went down for their naps, I couldn't help sneaking some more Cool Whip goodness for myself. Since I had a few scraps left from cutting off the top of the bars before cutting them, I was able to indulge in some more pumpkin goodness even after all of the bars were long gone.

This time I was able to put a bit more frosting on without any judging eyes (well... I'm sure my friends wouldn't judge me, they'd probably take more frosting for themselves leaving me with none left over!). And boy did it hit the spot. I grabbed a cup of coffee, some more scraps of pumpkin bar and enjoyed the perfect Fall treat as the kids napped.

I cannot wait to try the other Cool Whip Frosting flavors this holiday season! 


Cool Whip Frosting can be purchased at your local Wal-mart store. For more information, check out Cool Whip on Facebook. You can also check out the creative recipes others have made with Cool Whip Frosting by following the Collective Bias Kraft Cool Whip Frosting pinterest board. 

What would you enjoy with Cool Whip Frosting?

Disclaimer: I am a member of the Collective Bias™ Social Fabric® Community. This content has been compensated as part of a social shopper insights study for Collective Bias™ and Kraft Cool Whip. All opinions are my own. #CoolWhipFrosting #CBias #SocialFabric

Delicious Pumpkin Bars with Cool Whip Frosting #CoolWhipFrosting {Pumpkin Recipe}


Oh Fall! I'm so happy you're here again. We could definitely use the cooler weather (if that ever happened) and I'm very excited about the upcoming holidays. But a more important reason why I'm here... is because with Fall comes pumpkins! And canned pumpkin is on the shelves in full force.

That means I get to try a whole new batch of recipes out on my friends, family, and playgroup and this year is no different. I decided to go with a pumpkin bar. But the special ingredient isn't the pumpkin, it's the Cool Whip Frosting on top. If you want the perfect pumpkin treat this season you need to try this recipe.

Pumpkin Bars with Cool Whip Frosting
  • 3 eggs
  • 1 2/3 cups sugar
  • 1 cup vegetable oil
  • 15 oz pumpkin puree 
  • 2 cups flour
  • 2 teaspoons baking powder
  • 2 teaspoons cinnamon
  • 1 teaspoon baking soda
  • 1 teaspoon pumpkin pie seasoning
  • 1 teaspoon salt


1. Preheat oven to 350 degrees. Grease an 8x8 pan with butter or cooking spray.
 

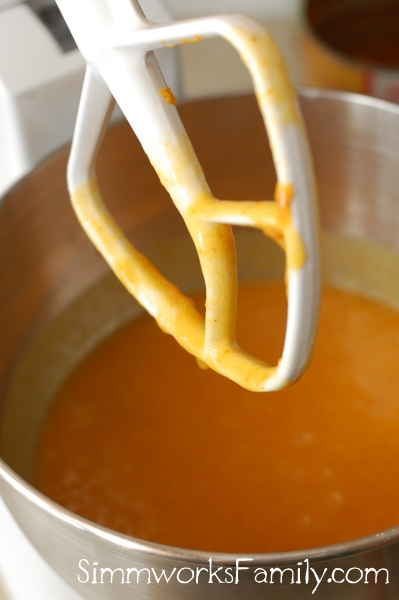
2. In a stand mixer with a paddle attachment, beat together sugar, pumpkin, oil, and eggs on medium until light and fluffy.


3. In a large bowl, sift together flour, baking soda, baking powder, cinnamon, pumpkin pie spice, and salt.


4. With a spatula, add flour mixture to liquid mixture until just combined. Make sure not to over-mix.


5. Pour batter into prepared pan and bake at 350 for 35-40 minutes.

  
6. Once the pumpkin bars are cooked, transfer to a cooling rack.
 

7. When completely cooled, cut off top to make an even, flat surface.


8. Cut into squares.


9. Grab the Cool Whip Frosting and start spreading it on.


10. Top each bar with a pecan and serve.


This recipe makes 16 servings.

Note: 
You can easily bake in a 9x13 pan instead for thinner bars to feed a larger crowd. Simply reduce cooking time to 20-25 minutes. Feel free to frost then cut if you feel that frosting each individual bar will take too long. I just hate dealing with crumbs in my frosting.


What do you love to make with pumpkin? 


Disclaimer: I am a member of the Collective Bias™ Social Fabric® Community. This content has been compensated as part of a social shopper insights study for Collective Bias™ and Kraft Cool Whip. All opinions are my own. #CoolWhipFrosting #CBias #SocialFabric

Wordless Wednesday: Painting Pumpkins


Pumpkin Cupcakes with Maple Cream Cheese Frosting {Dessert Recipe}

As I mentioned before, I'm a bit obsessed with pumpkin. And as soon as I got a whiff of coolness in the air I got to baking. I've been craving these cupcakes since the first time I made them a few years ago and with a few minor tweaks I think I've perfected my recipe.

These were delicious! And even better when left in the fridge overnight and eaten for breakfast the next morning with a hot cup of coffee ;) But if you can't wait that long to savor the goodness just make sure to allow the cupcakes enough time to cool before frosting them. You won't be disappointed!


Pumpkin Cupcakes With Maple–Cream Cheese Frosting

Cupcakes
  • 1 stick unsalted butter, room temperature
  • 1 cup firmly packed dark-brown sugar
  • 1/3 cup granulated sugar
  • 2 cups cake flour
  • 2 teaspoons baking powder
  • 1 teaspoon baking soda
  • 1 teaspoon ground cinnamon
  • 1 teaspoon ground ginger
  • 1/2 teaspoon ground nutmeg
  • 1/8 teaspoon ground cloves
  • 1/2 teaspoon salt
  • 1/4 teaspoon freshly ground black pepper
  • 3 large eggs
  • 1/2 cup buttermilk
  • 1 teaspoon vanilla
  • 1 cup canned pumpkin

Frosting
  • Two (8-ounce) packages cream cheese, softened
  • 1 stick unsalted butter, room temperature
  • 2 cups confectioners’ sugar
  • 1/4 cup pure maple syrup
  • 1 cup heavy whipping cream

 Preheat the oven to 350° (175°C). Line a cupcake pan with 18 liners.

Cupcakes:
Pour the milk into a measuring cup and add vanilla.

In a stand mixer, beat the butter and sugars on medium speed until fluffy, about 5 minutes. Meanwhile, sift the flour, baking powder, baking soda, cinnamon, ginger, nutmeg, cloves, salt, and pepper into a medium bowl.

Add the eggs one at a time to the mixer, scraping down the sides after each addition. Alternate adding the flour and milk mixtures, beginning and ending with the flour. Beat in the pumpkin until smooth. Scoop the batter into the cupcake liners, about 3/4 of the way up. Bake the cupcakes until a toothpick inserted into the center comes out clean, about 20 to 25 minutes. Cool the cupcakes on racks completely.

Frosting:
In a stand mixer beat all the ingredients on medium until fluffy but firm. Frost the cupcakes using either a spatula or a pastry bag w/ a large tip. Refrigerate the cupcakes for 30 minutes to set up frosting.

Pumpkin Cheesecake Bars {Dessert Recipe}

When Fall comes there is one thing I am most excited about. The return of canned pumpkin on the shelves! I start out small. Buying maybe 4 cans of pumpkin on my first spotting. Then I get a bit crazy. I need to stock up for the rest of the year. How can I not have 10 or so cans of pumpkin in my pantry by mid-October? And what do I use these cans and cans of pumpkin for? Healthier recipes!

Pumpkin is a great ingredient in baking, cooking and no-bake recipes such as this one. It's simple and easy to use and best of all... it's super tasty and healthy! Now I've already been making my pumpkin waffles, pumpkin muffins and even a pumpkin oatmeal shake. But I hadn't yet tried anything with pumpkin and cheesecake before. So this past weekend I decided to try out a no-bake recipe for pumpkin cheesecake bars. And they were delicious.

If you have a can of pumpkin lying around you have to try it!


Pumpkin Cheesecake Bars

  • 1 package (8 oz.) neufchatel cheese, softened*
  • 1 cup canned pumpkin
  • 1/3 cup agave nectar (or 1/2 cup sugar)
  • 1/2 tsp. pumpkin pie spice
  • 1 tub (8 oz.) Cool Whip Free whipped topping, thawed, divided
  • 1 package graham crackers (about 24), crushed
  • 4 tablespoons light butter, melted
Line an 8x8 or 9x9 baking dish with plastic wrap. Mix graham cracker crumbs and melted butter until the crumbs resemble moist sand. Push crumb mixture into dish with your fingers evenly to create a level crust on the bottom. Make sure to get the crumbs into the corners of the dish as well.

Beat cream cheese, pumpkin, agave and pumpkin pie spice with electric mixer on low speed for one minute. Increase speed to medium and mix for another 3 minutes or until no lumps are visible. Gently stir in 2-1/2 cups of the whipped topping. Cover and refrigerate remaining whipped topping for later use.

Spoon cream cheese mixture into crust and refrigerate 3 hours or overnight. Serve topped with remaining whipped topping. Store leftover cheesecake in refrigerator.

*How to Soften Cream Cheese
Place completely unwrapped package of cream cheese in microwavable bowl. Microwave on HIGH 10 to 15 seconds or until slightly softened. If you cannot find neufchatel cheese in your grocery store just go for the reduced fat cream cheese. Same thing, different name.

Serves 16 | 5 WW+ Points