

How to Create a Magic Wand
My daughter is obsessed with all things wands, swards, and sticks. Anything she can swing around and bop people on the head with (gently of course), she loves. And with our recent obsession with Cinderella since it came out on Blu-Ray we've been using sticks and swords to turn objects into other things just like the fairy godmother did for Cinderella.
As I was planning and preparing for our Halloween Princess party I decided to let the girls make their own wands customized to their likes and needs. It really was a simple craft and the kids had a great time doing it! With the help of mom and a glue gun to finish everything off.
So if you're little princess loves wands as much as mine does, I highly suggest trying your hand at making a magic wand. It's simple, easy, and takes less than 5 minutes!
Here's how!
What you'll need:
- wooden dowels, cut to size (we purchased 48" dowels and cut them in thirds)
- felt, any color
- ribbon, any color
- glue gun

What you do:
1. Cut out felt into the size and shape you want for the top of your wand. Cut out coordinating ribbon in the amount and length you prefer.

2. Do a dry run before gluing everything together to make sure the felt pieces fit together on the top of the wand.
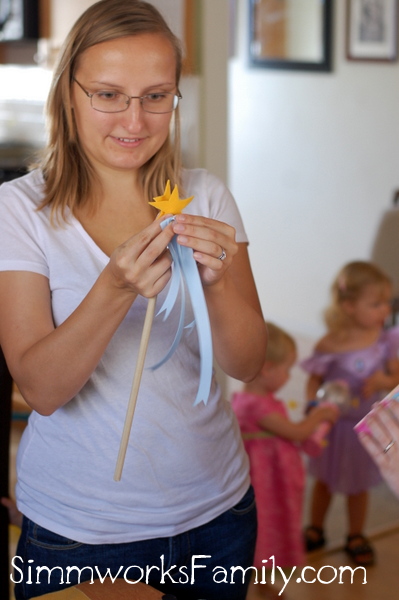
3. Tie the ribbon onto the top of the stick and secure with the hot glue.
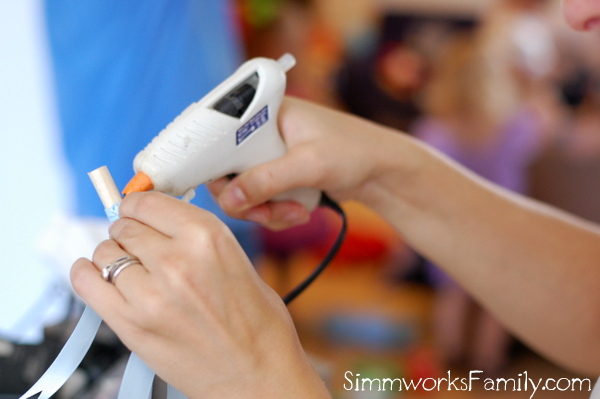
3a. Make sure to go all around the dowel so that the ribbon doesn't slip down.

4. Now it's time to glue down the felt pieces. Start with a small dab on one side of the dowel and adhere the first felt piece.

5. Then add a few dabs of hot glue to the other end of the dowel and the felt piece already adhered. Place the second felt piece on top covering the top of the dowel completely and sandwiching the ribbon in between the two felt pieces.

6. Hand the wand over to your favorite princess and watch them play!

See how easy that was?
What type of wand would you make?
A special thanks to my friend Kari of Mommy To Elodie for allowing me to photograph her putting her wand together at the party. It was rather hard trying to take pictures AND use a glue gun so I'm thankful for not burning myself. Plus Kari always has a creative edge when making crafts so I knew she'd make a gorgeous wand!
Disclaimer: I am a member of the Collective Bias™ Social Fabric® Community. This shop has been compensated as part of a social shopper insights study for Collective Bias™ and Disney Consumer Products, Inc. All opinions are my own. #CBias #SocialFabric


